I haven't done quite so much free motion quilting practice this week as I have been working on some of my other projects. I did have time to practise two new techniques which I learned from the Craftsy Class: Start Free Motion Quilting which is taught by Elizabeth Dackson.
The first is called 'Clamshell Loop'
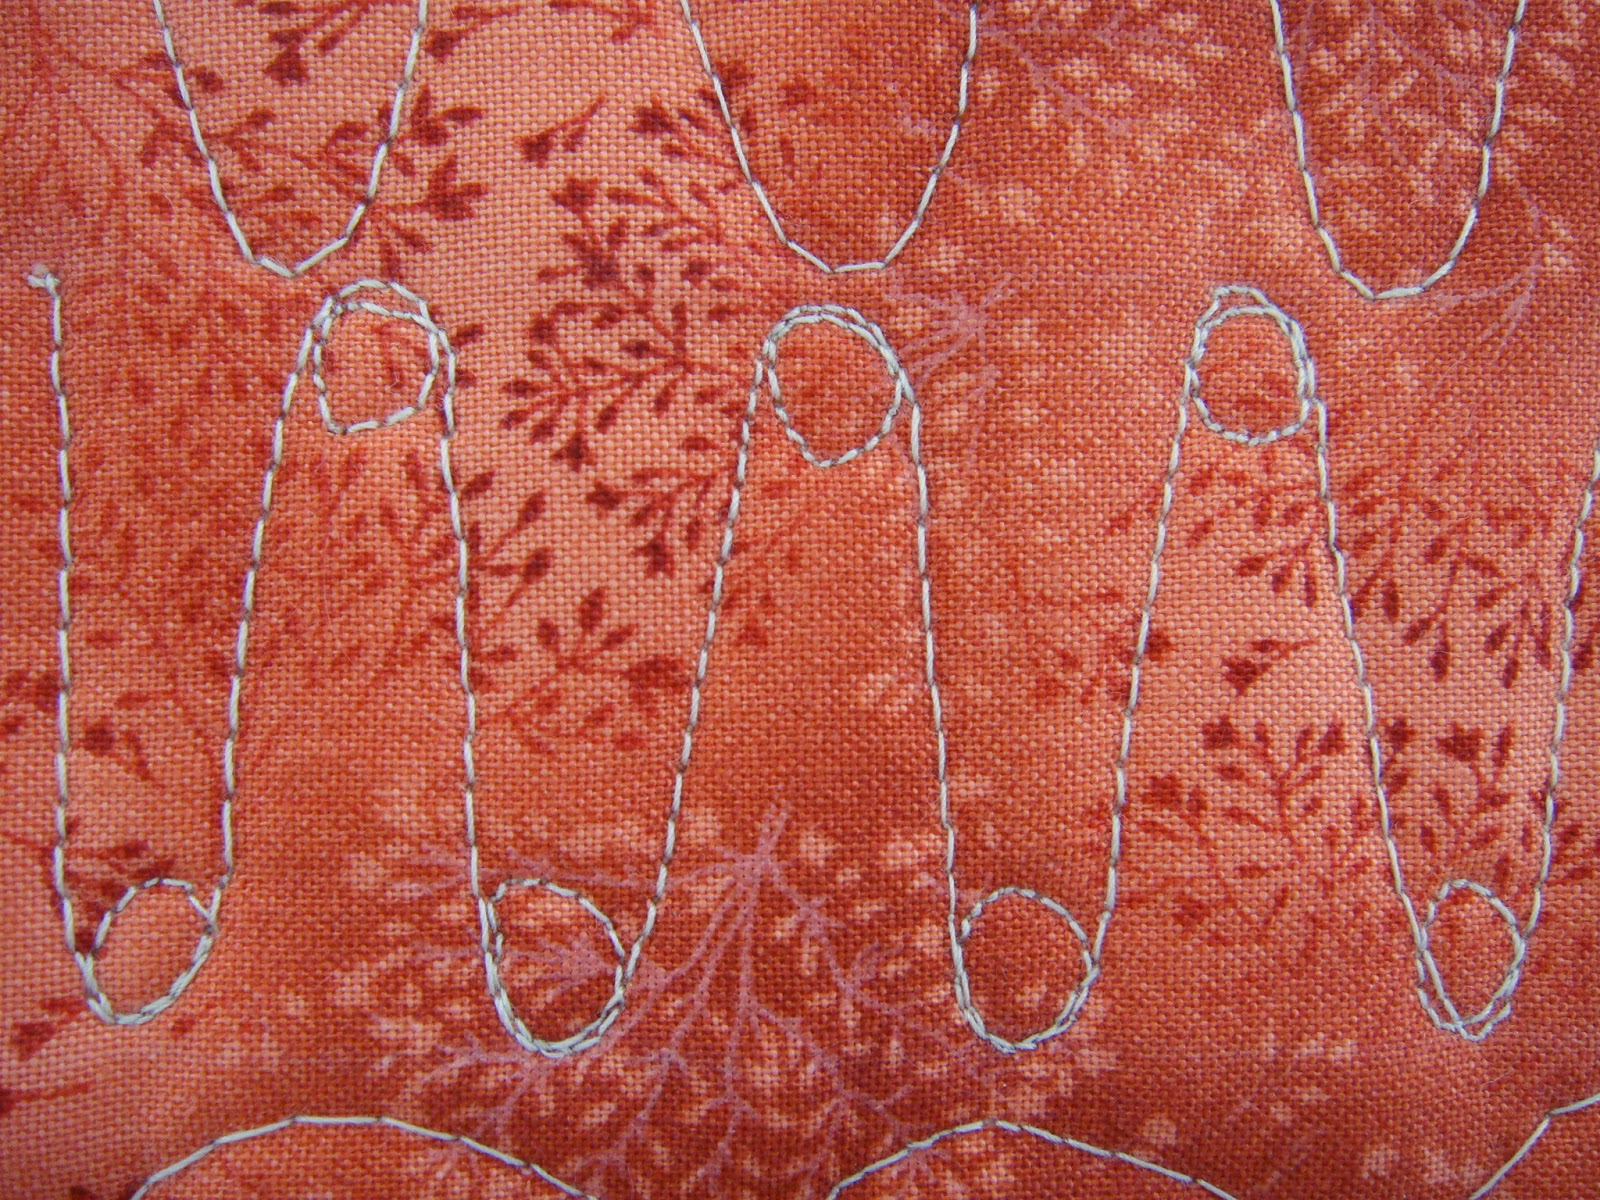
and the second is called 'Pulley'
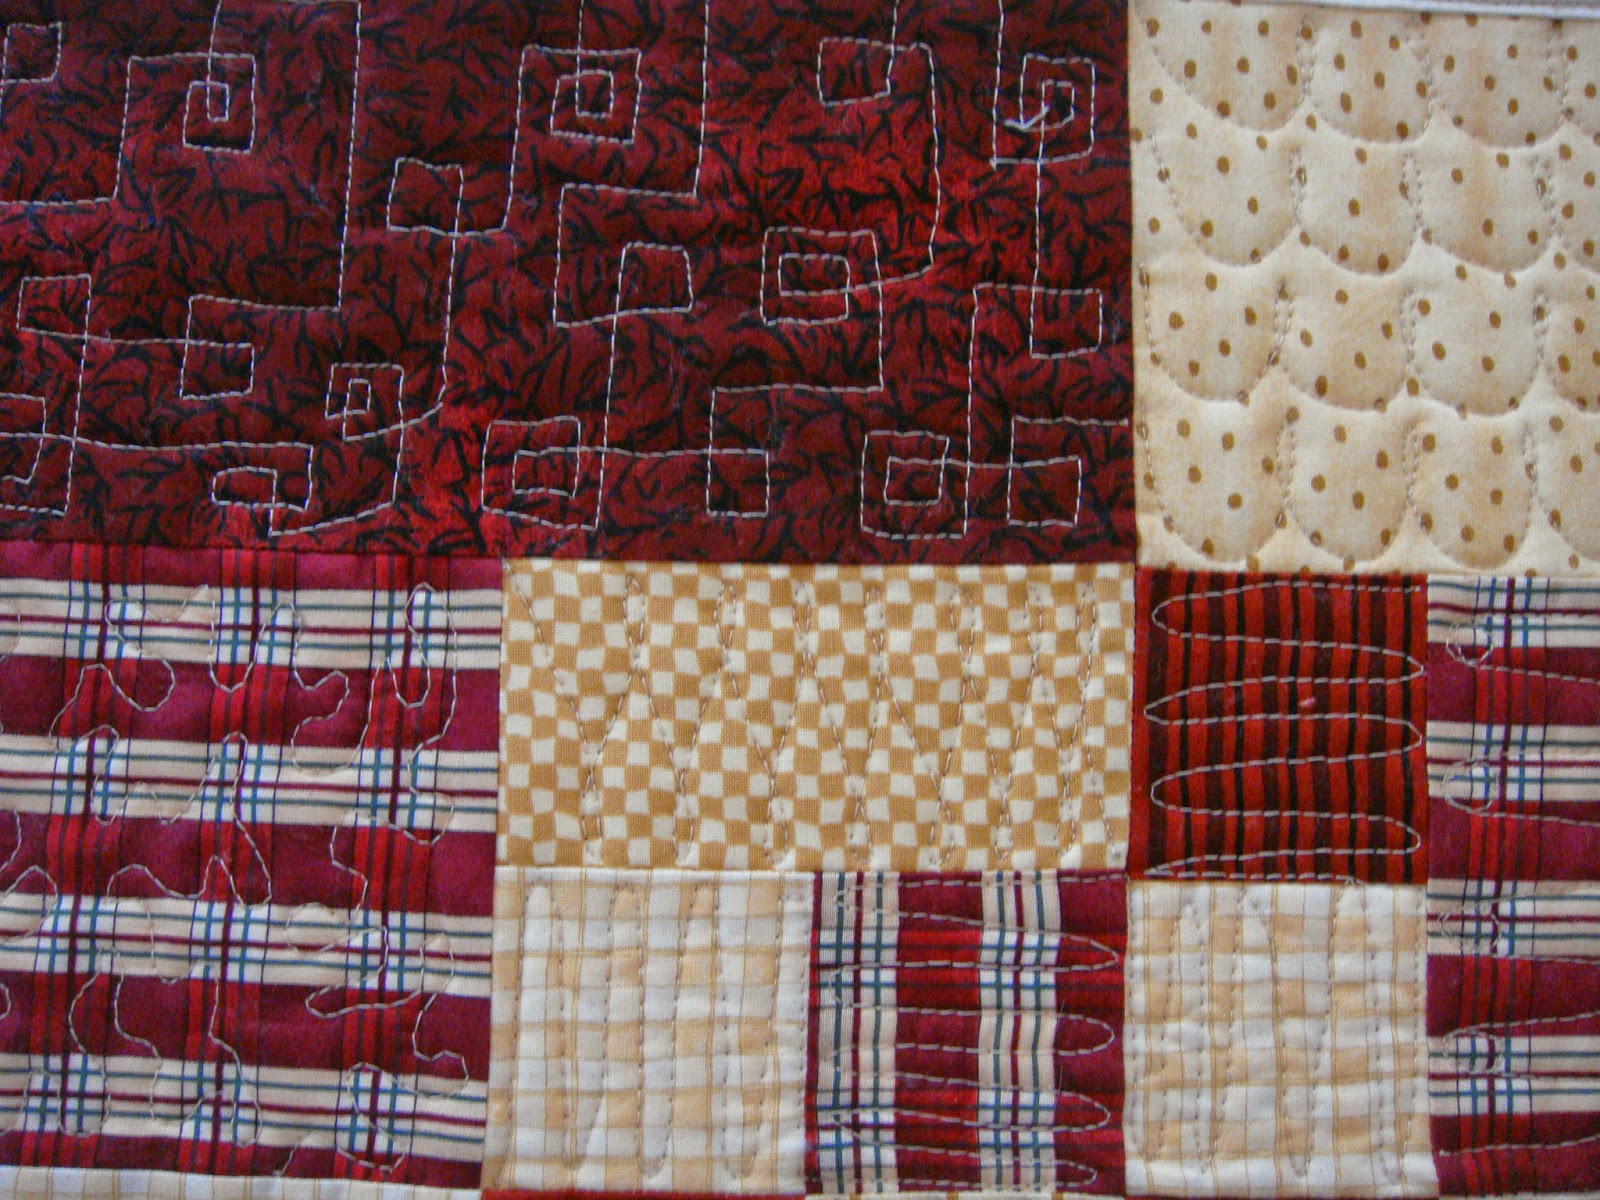
I have also done some practice stitches on a pieced sampler, combining a few of the different techniques I have been learning.
Tucked away in a bag in one of my scrap fabric boxes I found a number of pieced quilt blocks which I had obviously put together and then ended up not using for whatever reason. I decided that they were just perfect to make into quilt sandwiches and use to practise my FMQ stitches. I layered the first one up and started stitching. It is actually a little easier to see the stitching from the back.
I was so pleased with it that I decided to bind it and use it as a little table mat. Luckily I had been quite generous with the backing fabric so I didn't bind the mat as I would a traditional quilt, I just trimmed the backing one inch larger than the top (0.5 inch larger than the batting) and used it to self bind it. I am thrilled with how the FMQ stitches (not perfect but not bad either!) turned out and, that I now have a new mat to use in the house!!
I thought you might like to know how I'm getting on with block two of Leanne Beasley's beautiful four block quilt 'Mrs Beasley's Sampler Quilt'. Block one was great fun to work on and is a really pretty quilt block. Here's a reminder of how it looks.
Instructions for block two are given in the latest issue of Vignette magazine (issue 11) and as I had all the pieces cut and ready to go, I couldn't wait to get started on it!
I pieced together all the individual mini blocks and then sewed them together to make the larger block background. The next step was to add all the applique pieces which included a dresden plate appliqued to the centre of one of the mini blocks. I varied my block slightly from the instructions in the magazine as I used fusible applique rather than the hand-turned method.
Once all the applique pieces were fused into place, I transferred across the embroidery outlines using my new light box and a pencil.
I then finished off all the applique shapes using a small machine stitched zig-zag except for the dresden plate where, I used a running stitch.
Now I have lots of embroidery to stitch and I can't wait!! I'll keep you up to date with my progress.
Over the last couple of days, I have had time to make up the sweet little 'Ruby Cottage' embroidery I finished last week into the cushion that I wanted. You may recall that the 'Ruby Cottage' pattern was designed by Gail Pan and, gives instructions for you to make the embroidery up into a small wall hanging.
However, I wanted to use the embroidery to make a new cushion. I decided not to follow the pattern exactly for finishing off. Instead, I chose to use scraps of the same fabrics that I had used to make this 'heart' cushion some while ago. That way I knew the two cushions would really coordinate together well.
I trimmed off the embroidery to make an eight inch square. I then searched through my scrap fabrics for pieces of the same fabric that I had used for the first cushion.
I managed to find just enough for what I wanted to do.
I used the embroidery to form the centre square of a 'courthouse steps' block which I made large enough to use as the front of the cushion. (approximately 16 inches square). When I had finished piecing the block I pressed it well and laid it onto some batting so that I could quilt in the ditch around each border added to the central square. I tidied up the loose ends and trimmed off the batting to match the front of the cushion. I also added a few buttons to give a little extra dimension.
I also decided to add a few buttons to the heart cushion to further tie the style of the cushions together. I finished off the new cushion by making an envelope style backing.
I am really pleased with my new cushion and I love how well it coordinates with the one I had already made.
A couple of weeks back my parents came to stay with me at my new house. It has been some number of years since they have been able to come and stay as, for the last few years, they were not able to travel over to visit us when we lived in Switzerland. We had, of course, been to visit them but, they had not been able to come and visit us. As a result, they had not made the acquaintance of my two little dogs, Poppy and Dexter and I wasn't sure how they would all get on.
I didn't need to be worried however, as they thought they were very cute and cuddly. My Mum had obviously been very taken with the dogs as, a couple of days ago I received a little present in the post from her. This is what was inside.....
Aren't they cute?!! My Mum had sent me a knitted version of Poppy and Dexter and I think she captured quite a good likeness!! I love them!!
Today I have been making another small gift. It is for my friend's son this time. I didn't like the idea of him feeling forgotten if his sister received the owl bag I made for her, so I had to think long and hard what I could make that would be a nice gift for him. He is a little older and is a fan of Pokemon and I thought it would be nice to try and feature one of the Pokemon characters in his gift.
I found an image for the character 'Gengar' which was simple enough for me to draw and then make into an applique. Once I had made the applique character I wasn't quite sure what to do with it. I considered a cushion but the idea didn't really appeal to me, so I looked through a few of my quilt books for inspiration and I found it in the shape of a fabric folder to hold pens and a notepad. The project is from the book 'Quilting in No Time' by Emma Hardy. I adapted the pattern so that my applique of Gengar was on the front cover.
Inside the folder there are pockets for a notepad and some pencils. I think my friend's son is going to enjoy using the pencils and notepad in his new folder, especially as it has one of his beloved Pokemon characters on the front! I have to say it is not one of the most attractive applique designs I've ever made but nevertheless, I am pleased with the finished folder.
Hello! Here is the latest update of my free motion quilting progress. I practised a different FMQ stitch each day last week and here is how it went. Each of the stitches I practised came from the Craftsy class, 'Start Free Motion Quilting' taught by Elizabeth Dackson. Elizabeth also has a lovely blog where she shares advice on her free motion quilting techniques called 'Don't Call Me Betsy'.
Monday: Stippling and Loopy Stippling:
Tuesday: Loopy Flowers:
Wednesday: Woodgrain:
Thursday: Circuit Board:
Friday: Linear L:
Saturday: Wishbone:
Sunday: day of rest!!
I am really pleased with how things are going. Of course, the stitching isn't perfect and a LOT more practice is needed but, I can see and feel improvements. So far, I feel that I am keeping on top of things and, that with some more practice, at long last I may even be able to achieve my goal of being able to FMQ to a reasonable standard. I just have to keep practising!!
This weekend I have had time to work on my version of the sweet little Ruby Cottage Pattern designed by Gail Pan.
I finished stitching the embroidery this afternoon. I have decided that instead of making it into a small wall hanging (as the pattern suggests) I am going to make it into a cushion. All I have to do now is to choose some complimentary fabrics and get them cut out and pieced together.
It should go together fairly quickly, so long as I don't take too long making up my mind which fabrics to use!!
You may or may not know how much I love owls and, I have really been enjoying the fact that owls have become so popular. I have made quite a number in a variety of different ways, crocheted, embroidered, sewn and appliqued.
There are hundreds of owl projects on Pinterest and on various blogs and, seeing them from time to time has made me start feeling the need to make a new owl project.
This week I wanted to make a gift for a friend's little girl and I thought that perhaps I could combine the two ideas. I have seen some very sweet little owl bags made and I thought that I could make one of my own, so I did.
I tried a different construction to many of the bags I have made in the past. For this bag, I made a template shape for the bag front and back as well as for the applique pieces for the owl face. I drew round all the shapes onto fusible web, fused them onto the wrong side of their appropriate pieces of fabric and then cut them out (including the bag front/back and the lining front/back.) I peeled off the backing paper from the fusible web and fused the bag front/ back pieces onto some batting. I peeled off the backing paper from all the owl face shapes, positioned them where I wanted them on the front of the bag and, fused them into place. I finished off the edge of all the applique pieces with a machined zig-zag stitch.

Then I trimmed up the batting to match the shape of the front and back pieces of the bag. Next, I peeled off the backing paper from the lining pieces and placed them on top of the batting side of the bag front and bag back and fused them into position. (They were exactly the right size and shape.) I made some bias binding and I bound the top edge of the front/back bag pieces, trimming up any extra binding to match the side edges. I placed the bag front and back pieces together right sides out, matching the raw edges and then bound the two sides together with another piece of bias binding. I extended the binding at the top edge to make the handle and there you have it, one cute little owl bag!
I was pleased with how it all went together and I found that the stiffness of the fusible web I had used on the front and back of the bag gave it some extra strength so that it should keep its shape nicely. I added some buttons to finish off the eyes and a piece of ribbon as a sweet little label on the back.
Hope my friend's daughter will like it!
My first week of practising free motion quilting has come to an end and, I have been a good girl, only missing one practice out of the seven days! Each day I made up a 'quilt sandwich' and practised various free motion quilting techniques. This first week I was keen just to get the feel of my machine: Did I have the settings right? Was a I comfortable with the position of my hands? How fast should I sew? Feed dogs up or feed dogs down? Gloves on or gloves off? Even though it has been only a week I do think that things have improved.

At first, when I put my foot on the pedal, I kept thinking that I had to keep going (even if things were going slightly awry) until I came to the end of that line of stitching (as if the machine was in control!) Now, I know that I can stop, breathe and reposition my hands whenever I want. I have also learned roughly what speed I need to be sewing at to achieve a more even stitch length and, I also think that my curves and turns are looking smoother and less jerky (very important to a perfectionist like me!)
As you can see from the samples I have stitched, each day I have tried a combination of techniques. However, this coming week, each sample is going to be dedicated to one particular technique in attempt to improve each of them one by one.
My last sampler was this lilac one and I do think that you can see an improvement from my first sampler which was the red one I showed you last time. I did have a problem part of the way through the lilac sampler as, I ran out of bobbin thread and, the new thread that I used caused a tension problem with my machine. You can see that by these little dots of blue thread pulling through to the top of the sandwich. I have sorted this out now but, it did make me realise how important it is to get the set up of your machine absolutely right before you start sewing!!
I do already feel much less intimidated by free motion quilting and I can't wait now to practise each technique one at a time both in my own way and, following along with Elizabeth Dackson's class on Craftsy.
I am finally all caught up with everything here and have had a little bit of time for working on some of my projects. This weekend should be a quiet weekend and I am hoping to make good progress on my 'Ruby Cottage' embroidery. This sweet little embroidery project is a design by Gail Pan (one of my favourite designers) and I am hoping to finish it off and turn it into a cushion.
I've made a good start now and I love how the little cottage is coming to life!
If I get it finished off, I may even have time to start work on block two of my Mrs Beasley's Sampler Quilt. I have been itching to get started on it but just haven't been able to fit it in. The quilt is designed by Leanne Beasley. It is a project which is being published over four issues of her magazine 'Vignette'. So far just block one and block two have been published.
Whatever your plans are for the weekend, I hope you have fun!


.JPG)

.JPG)

.JPG)
.JPG)

.JPG)
.JPG)


.JPG)


.JPG)


.JPG)